Basic Programming
Our microcontroller can't program itself. Therefore, we need to communicate with our Arduino board using programmed instructions written in C++.
Writing your first sketch
If you open a new sketch using the Arduino IDE, you will be faced with this boilerplate that contains two functions:
void setup() {
  // put your setup code here, to run once:

}

void loop() {
  // put your main code here, to run repeatedly:

}
void setup()- This function executes only once when the Arduino board is reset. You should program configurations here that are intended to run once.void loop()- This function executes continuously, asloopimplies. You should program tasks here that run repeatedly. For example, reading data from sensors.
Blinking the on-board LED
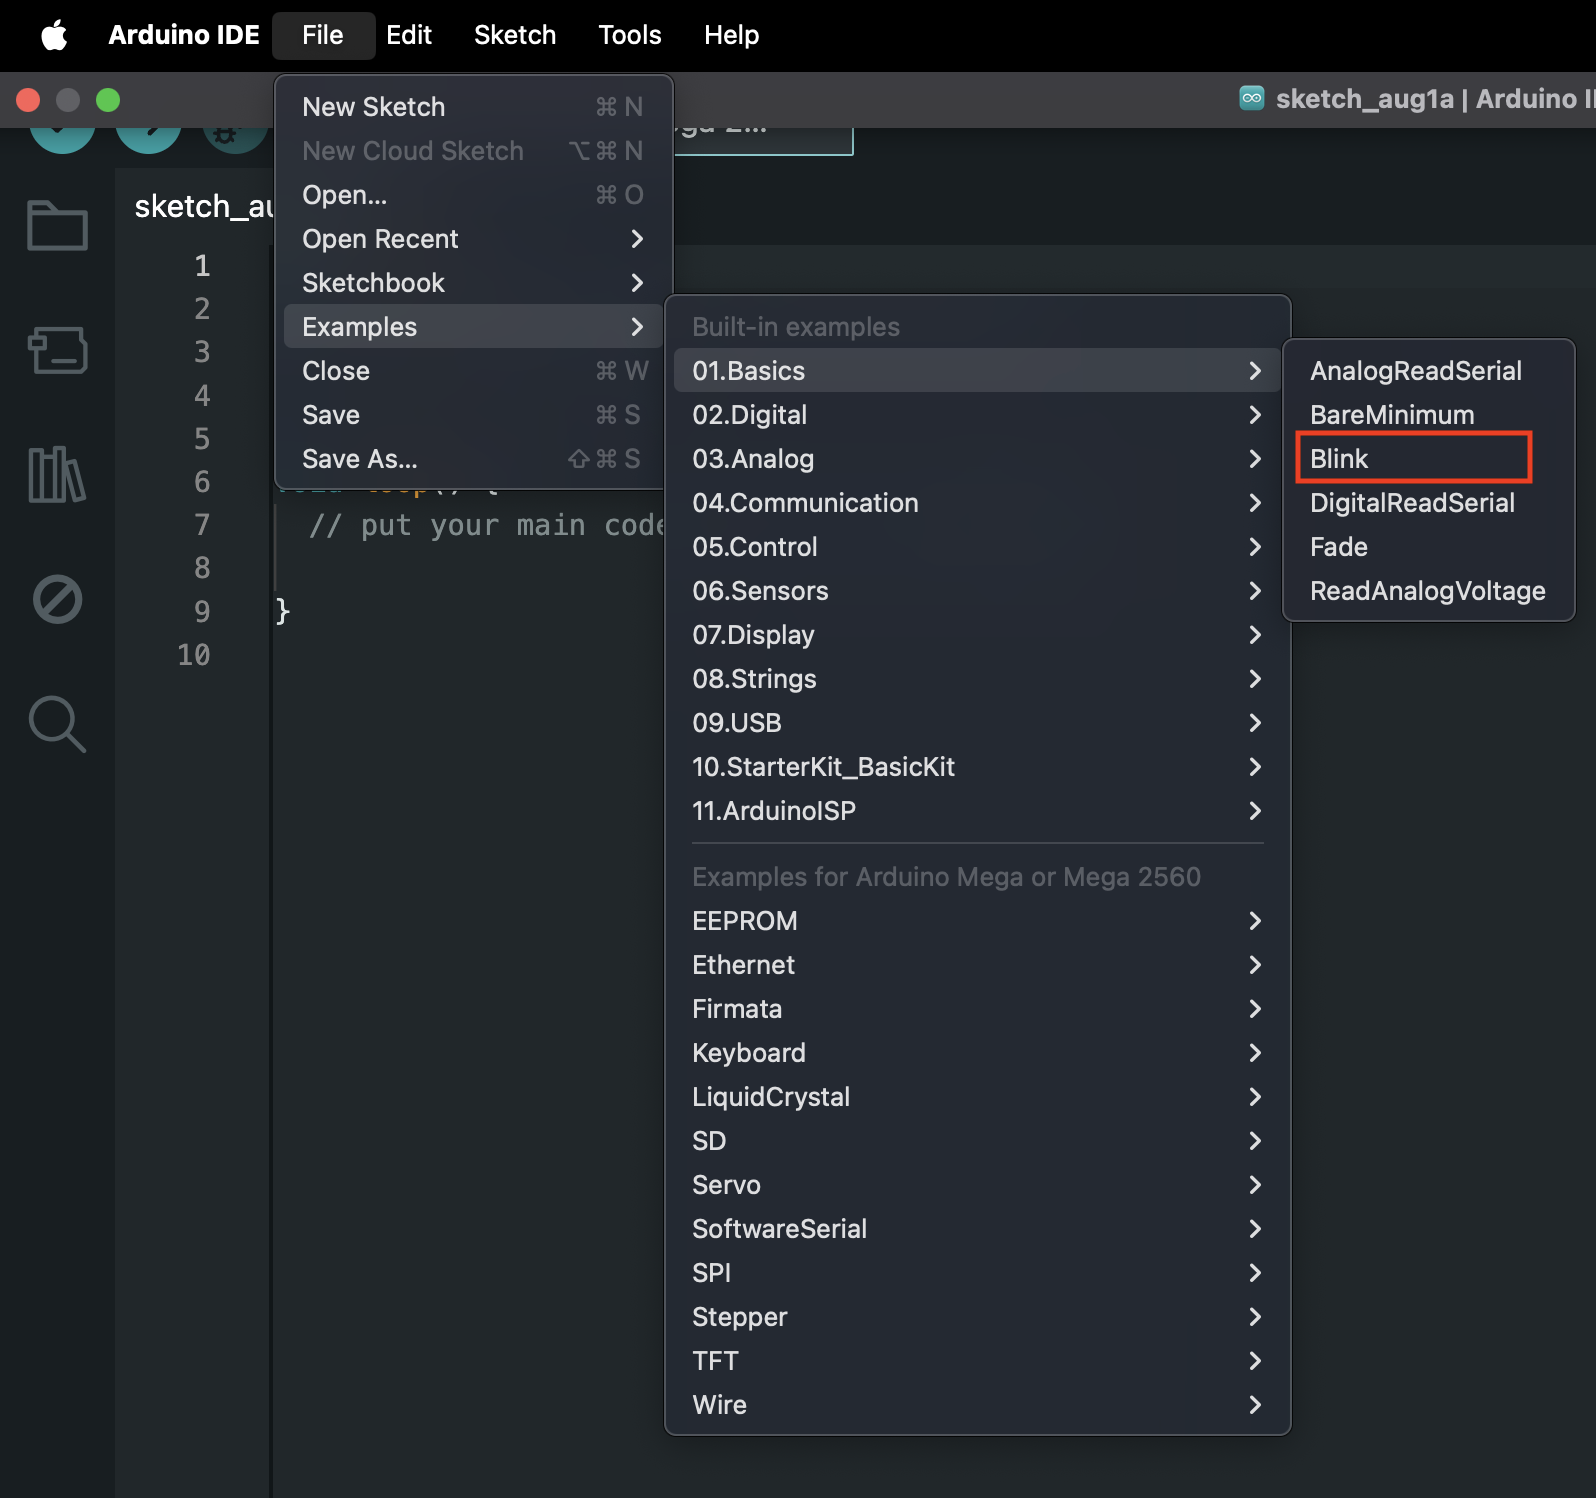
We will use an example sketch to blink the on-board LED on your Arduino microcontroller. From the menu, open the Blink example as shown below.
You should be able to see this sketch:
// the setup function runs once when you press reset or power the board
void setup() {
  // initialize digital pin LED_BUILTIN as an output.
  pinMode(LED_BUILTIN, OUTPUT);
}

// the loop function runs over and over again forever
void loop() {
  digitalWrite(LED_BUILTIN, HIGH);  // turn the LED on (HIGH is the voltage level)
  delay(1000);                      // wait for a second
  digitalWrite(LED_BUILTIN, LOW);   // turn the LED off by making the voltage LOW
  delay(1000);                      // wait for a second
}
Now, plug in your Arduino board into your computer using the USB lead and select your microcontroller to establish a connection.
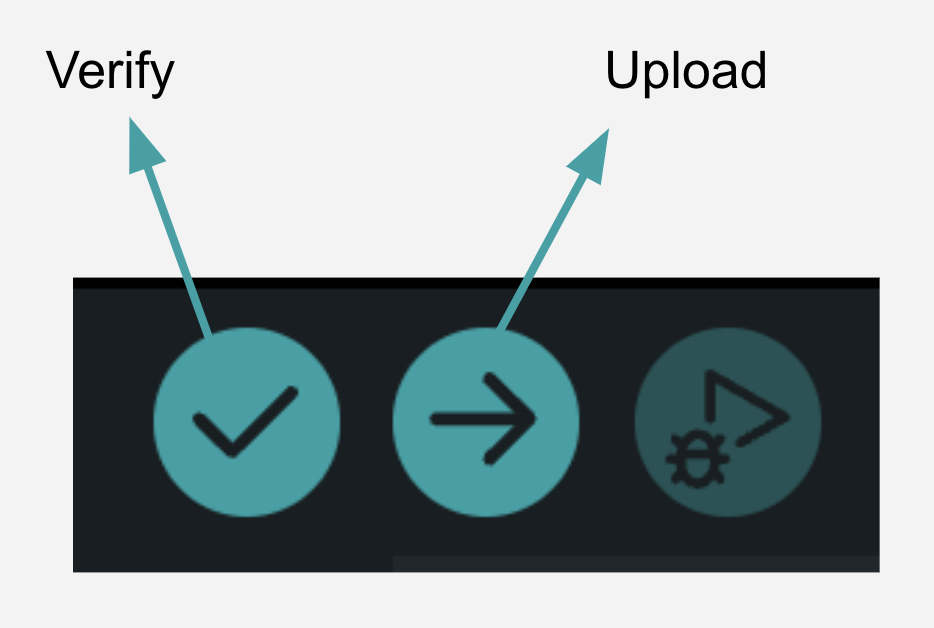
Notice you have two buttons in your IDE:
Verify- Tells the IDE to check the code for syntax errors, compiles the sketch into machine code (binary), and reports any errors in the console.Upload- Performs theVerifystep, followed by sending the binary code to the Arduino board.
The Verify tool can be useful to check your syntax for any errors without having to upload your sketch to your microcontroller.
Click on the Upload button to send your code over to your Arduino board. Once the sketch has been uploaded, you should see the yellow on-board LED start to blink. Congratulations!
Variables
Defining variables
variable_datatype variable_name;
int myNum;
Assigning a value to a variable
variable_name = value;
myNum = 10;
This article showcases some of the commonly used datatypes.
Comments
// We can write comments using the two forward slashes
// Comments are ignored by the compiler and allow us to make our programs more maintable and easier to understand
Operators
Arithmetic operators
| Operator | Symbol |
|---|---|
| Addition | + |
| Subtraction | - |
| Multiplication | * |
| Division | / |
| Remainder | % |
Comparison operators
| Operator | Symbol |
|---|---|
| Greater than | > |
| Less than | < |
| Greater than or equal to | >= |
| Less than or equal to | <= |
| Equal to | == |
| Not equal to | != |
Logical operators
| Operator | Symbol |
|---|---|
| OR | || |
| AND | && |
| NOT | ! |
Assignment
- Remember the
Blinkexample sketch from earlier? Re-open it, but this time, change thedelayto 500 milliseconds. Use a variable to store this delay time and ensure you have meaningful comments where applicable. If stuck, read the documentation for thedelay()function here.
Next Steps
This section includes links to help you dive deeper into the topics from this lesson. It's optional, so don't worry if you choose to skip it.