Buzzers
Buzzers are an easy and effective way to bring in sound into your Arduino projects. We must understand that there are 2 different types of buzzers: active buzzers and passive buzzers.
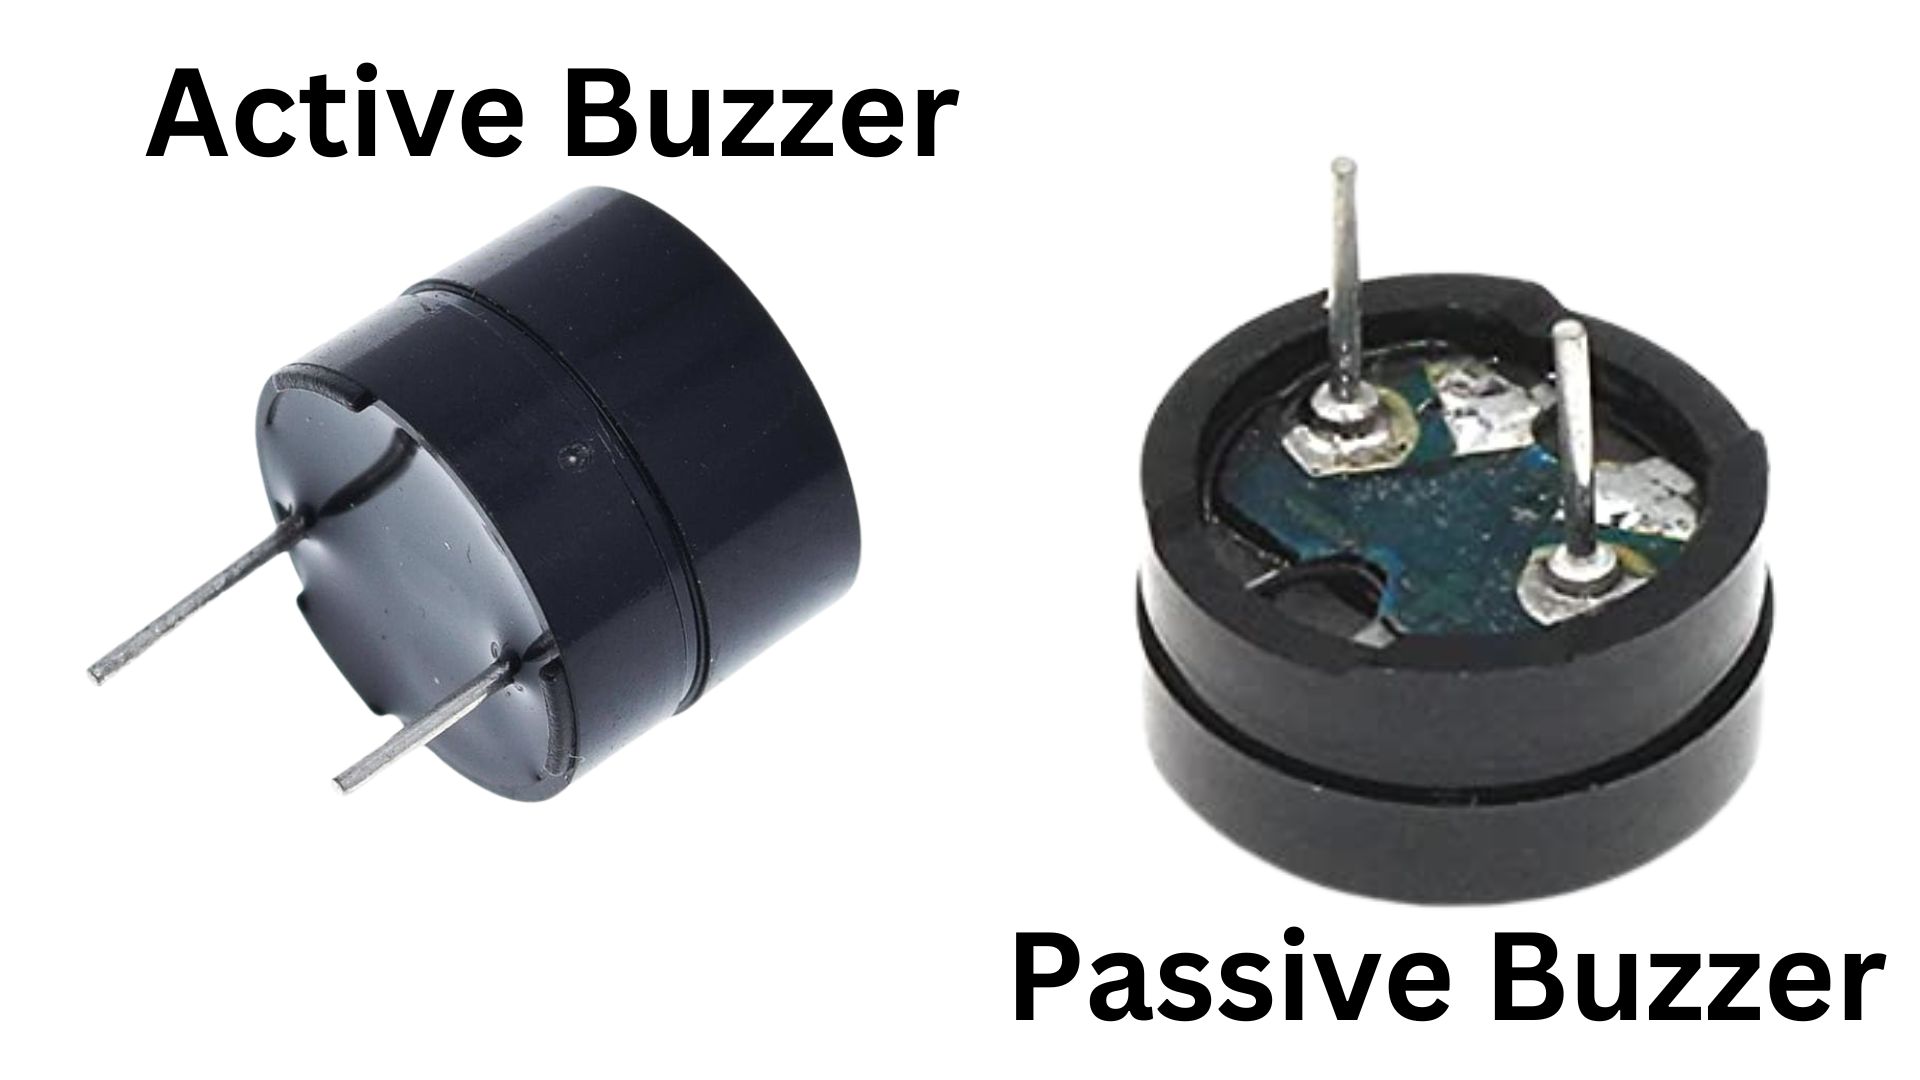
Using active buzzers
Active buzzers are active because they require a DC voltage to produce souund. Passive buzzers, however, need an AC voltage to produce sound.
Constructing your circuit
Components required:
- 1x Active buzzer
- Your Arduino board
- Breadboard
- Jumper wires
- Problem
- Solution
Search up your active buzzer's datasheet online. Datasheets will be your friend when learning about new components since they provide all the necessary information you will need to construct your circuit.
Try building your circuit using this schematic:
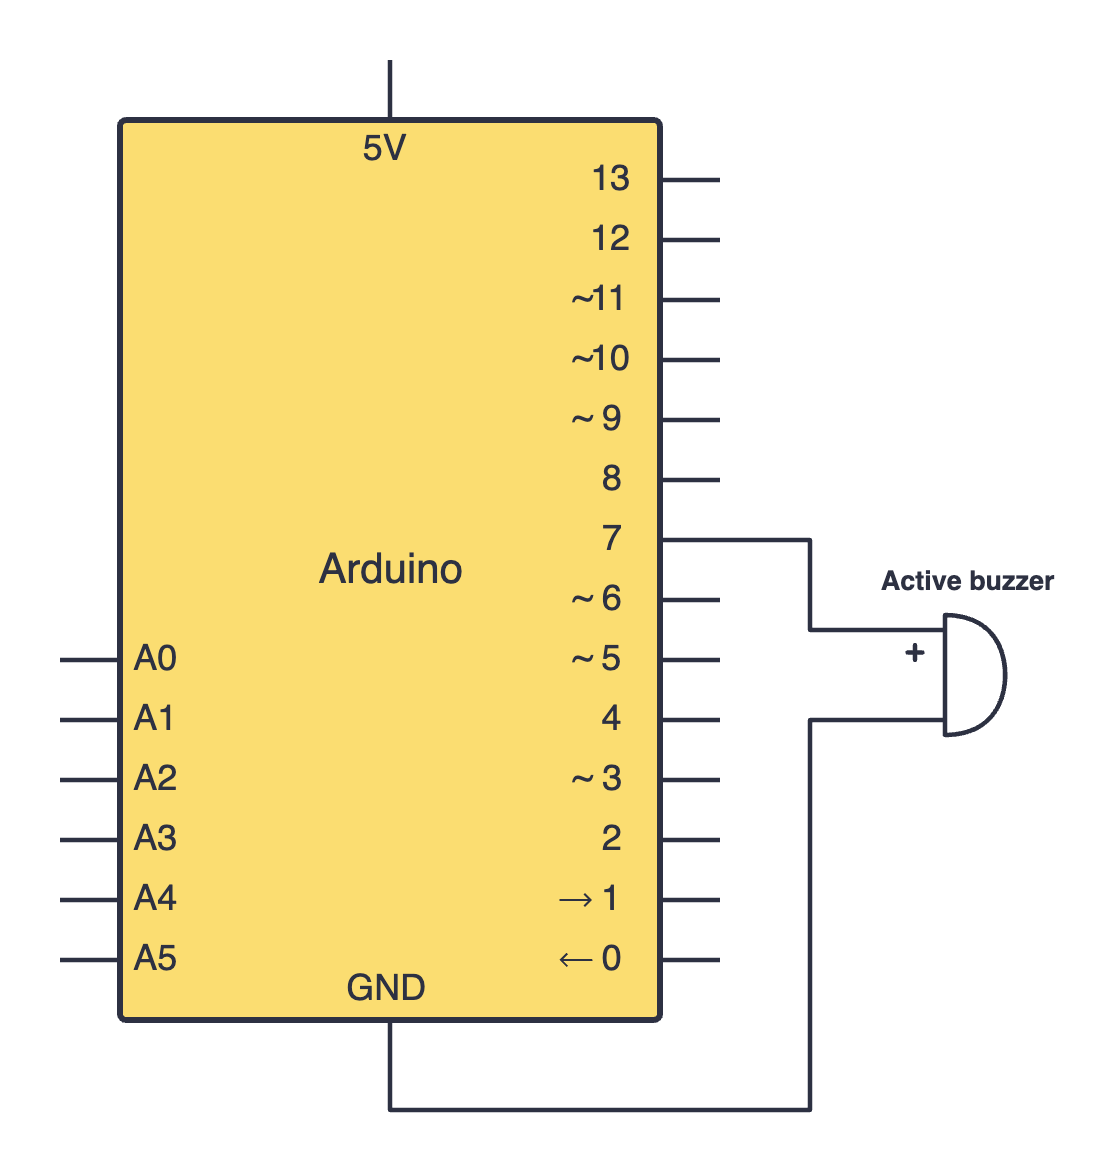
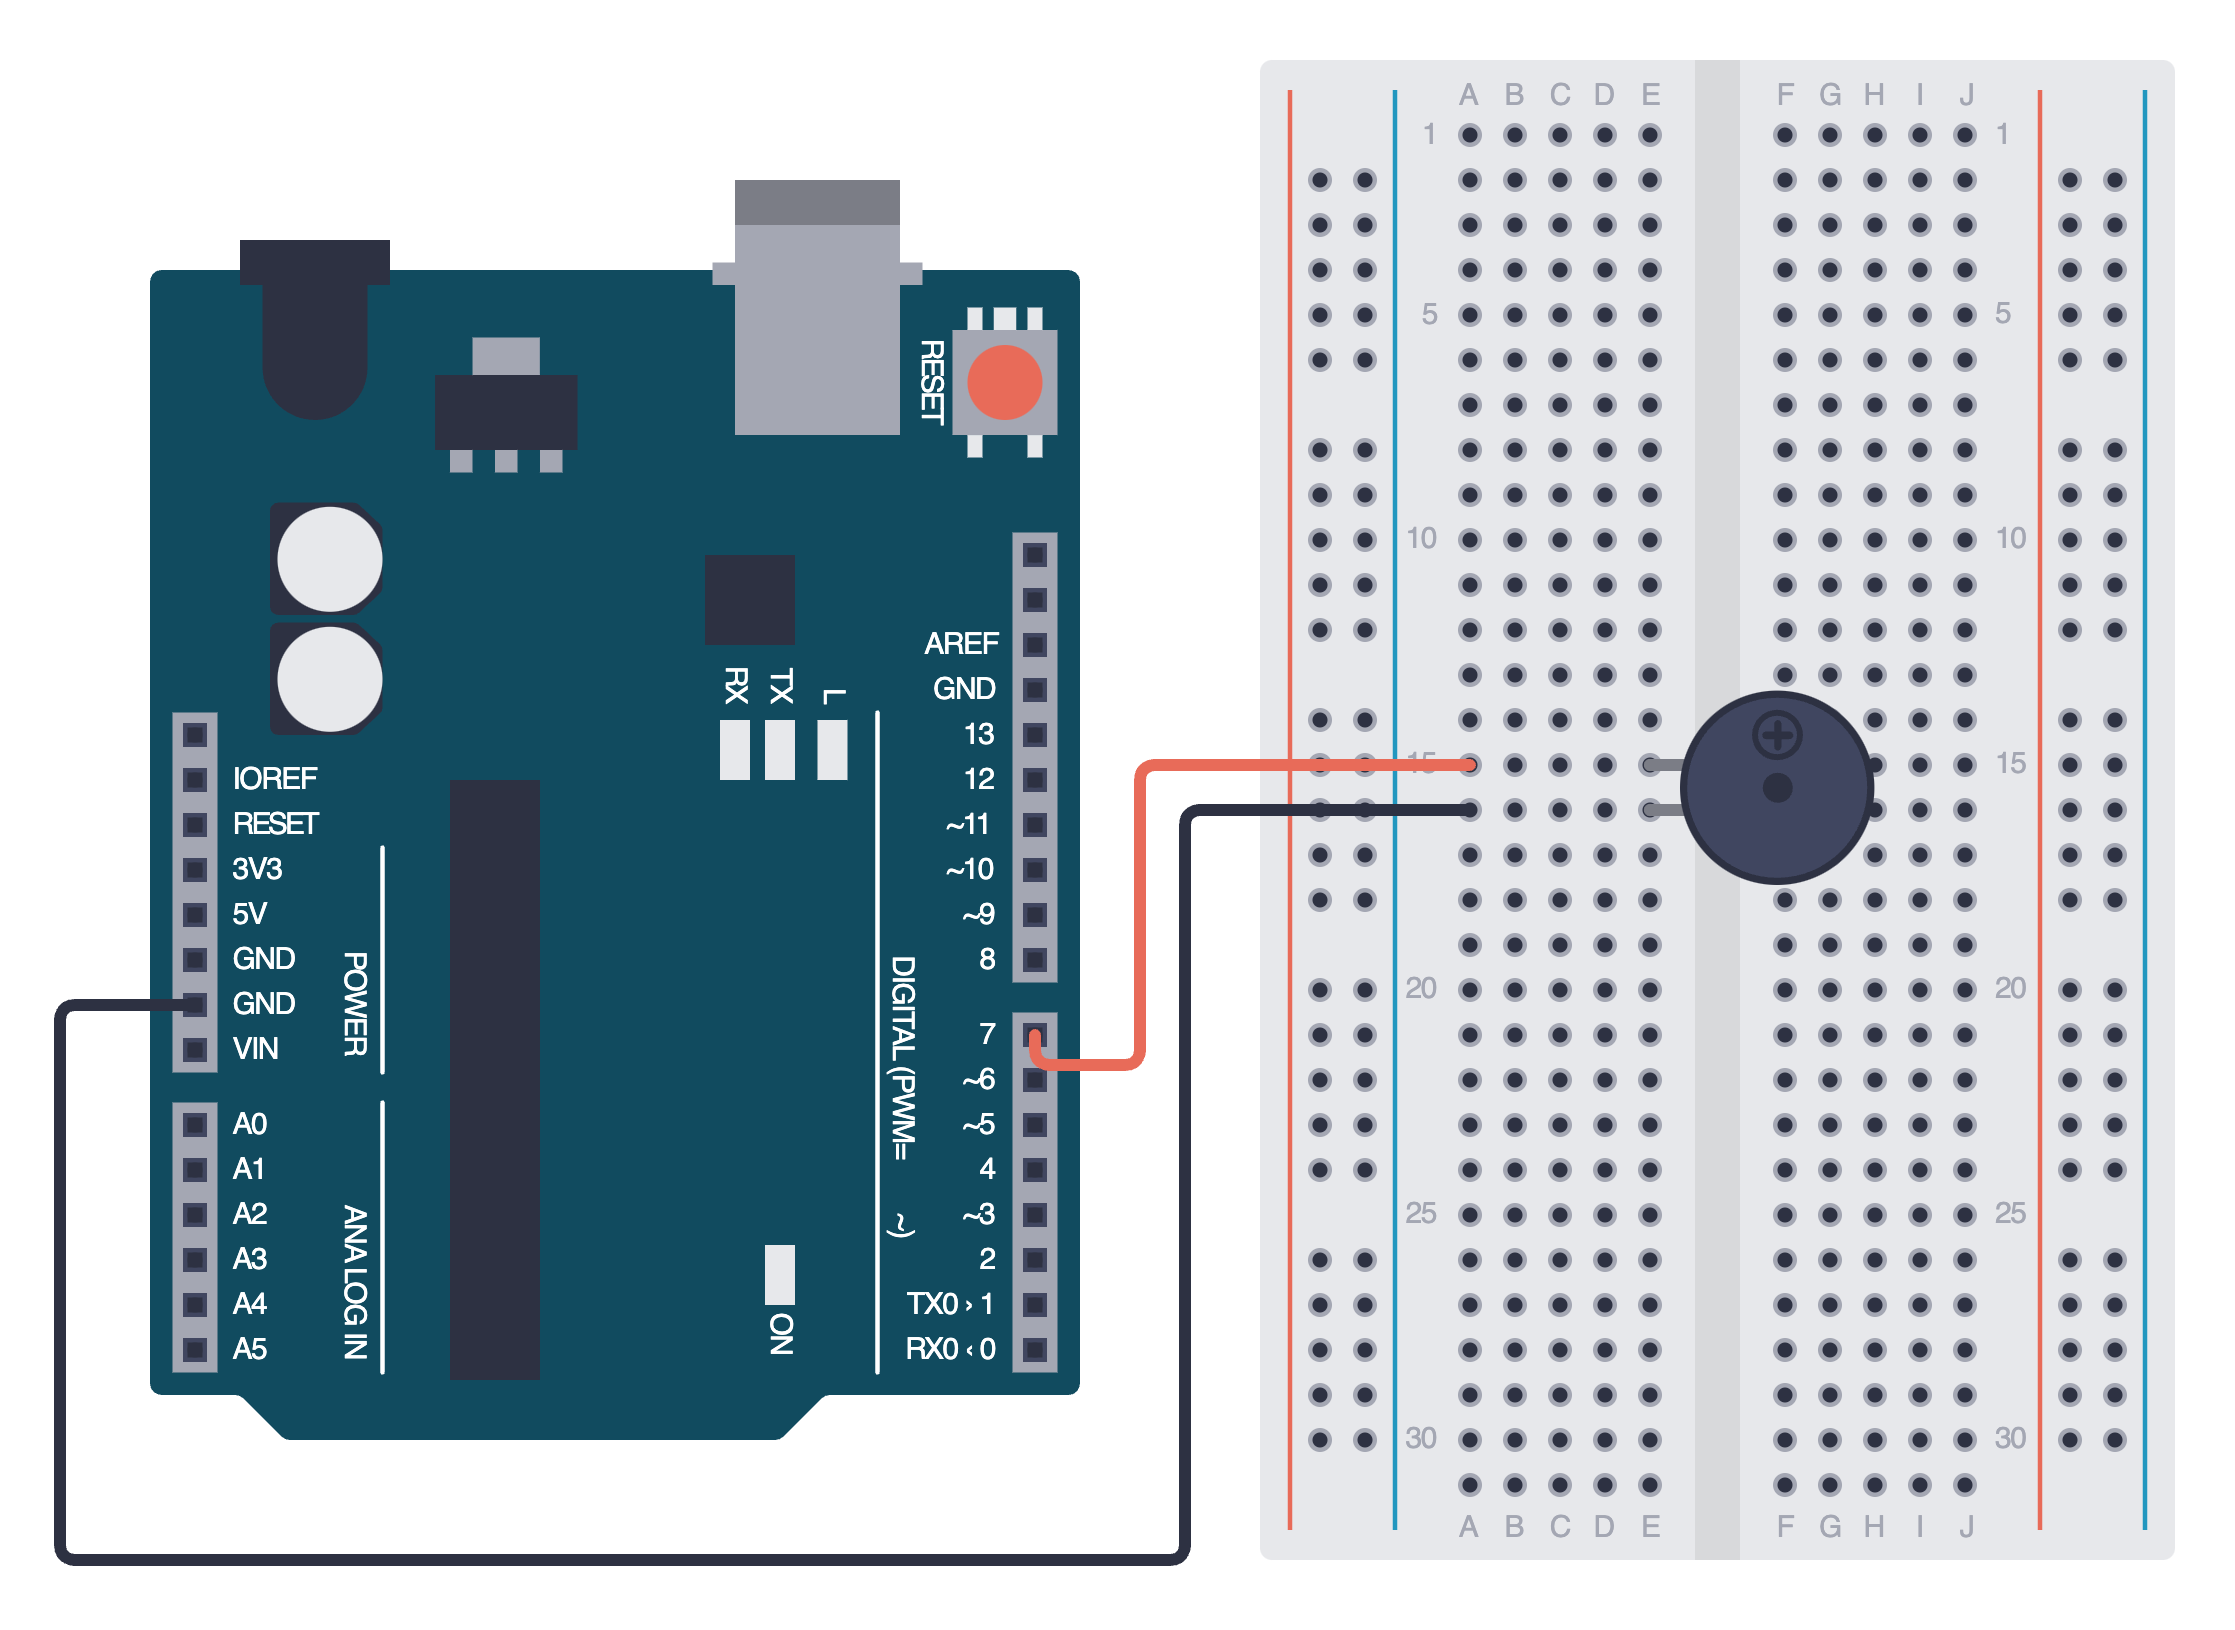
Below is the equivalent circuit diagram for this schematic. Did you hook up your components correctly?
Programming your active buzzer
Active buzzers can be programmed in a similar way as LEDs using the digitalWrite() function.
int buzzerPin = 7; // Active buzzer connected to pin 8

void setup() {
  pinMode(buzzerPin, OUTPUT);
}

void loop() {
  digitalWrite(buzzerPin, HIGH); // Turn buzzer ON
  delay(1000);                   // Wait 1 second
  digitalWrite(buzzerPin, LOW);  // Turn buzzer OFF
  delay(1000);                   // Wait 1 second
}
digitalWrite(buzzerPin, HIGH)sends 5V to our buzzer, making it play a tone. This tone cannot be changed.
Using passive buzzers
On the other hand, passive buzzers can be useful to play musical notes and produce tones.
Constructing your circuit
Components required:
- 1x Passive buzzer
- Your Arduino board
- Breadboard
- Jumper wires
- Problem
- Solution
This time, search up your passive buzzer's datasheet online. Passive buzzers are connected in the same way as our active buzzers. Try building your circuit once more using this schematic:

Below is the equivalent circuit diagram for this schematic. Did you hook up your components correctly?
Programming your passive buzzer
To program a passive buzzer to make it play tones, we have to use the tone() function. The tone() function generates square waves which are sent to the passive buzzer to produce sound. By changing the frequency, we can change the pitch of the sound to generate new musical notes.
We can use the noTone() function alongside this to turn off the tone() function. Let's look at this example sketch to understand how this works better:
int buzzerPin = 7; // Passive buzzer connected to pin 7

void setup() {
  // No pinMode needed for tone() function
}

void loop() {
  tone(buzzerPin, 1000); // Play 1000Hz tone
  delay(1000);
  noTone(buzzerPin);     // Stop tone
  delay(1000);
}
Assignment
- The
tone()function can be used to play melodies by generating musical notes at a specific frequency. Try playing around with different frequencies to create a simple, short melody that consists of 3-5 notes. You can use this table to figure out which frequencies correspond to which notes.
Next Steps
This section includes links to help you dive deeper into the topics from this lesson. It's optional, so don't worry if you choose to skip it.
- This article covers how to use buzzers to play more complicated songs.