Using Potentiometers
A potentiometer is essentially a variable resistor, which means turning the knob changes its resistance, allowing us to control the output voltage. Potentiometers have 3 pins: two power supply pins (5V and GND), and one pin that connects an analog input pin on your Arduino board.
Constructing your circuit
Components required:
- 1x Potentiometer
- Breadboard
- Jumper wires
- Your Arduino Uno
- Problem
- Solution
Search up your potentiometer's datasheet online. Datasheets will be your friend when learning about new components since they provide all the necessary information you will need to construct your circuit.
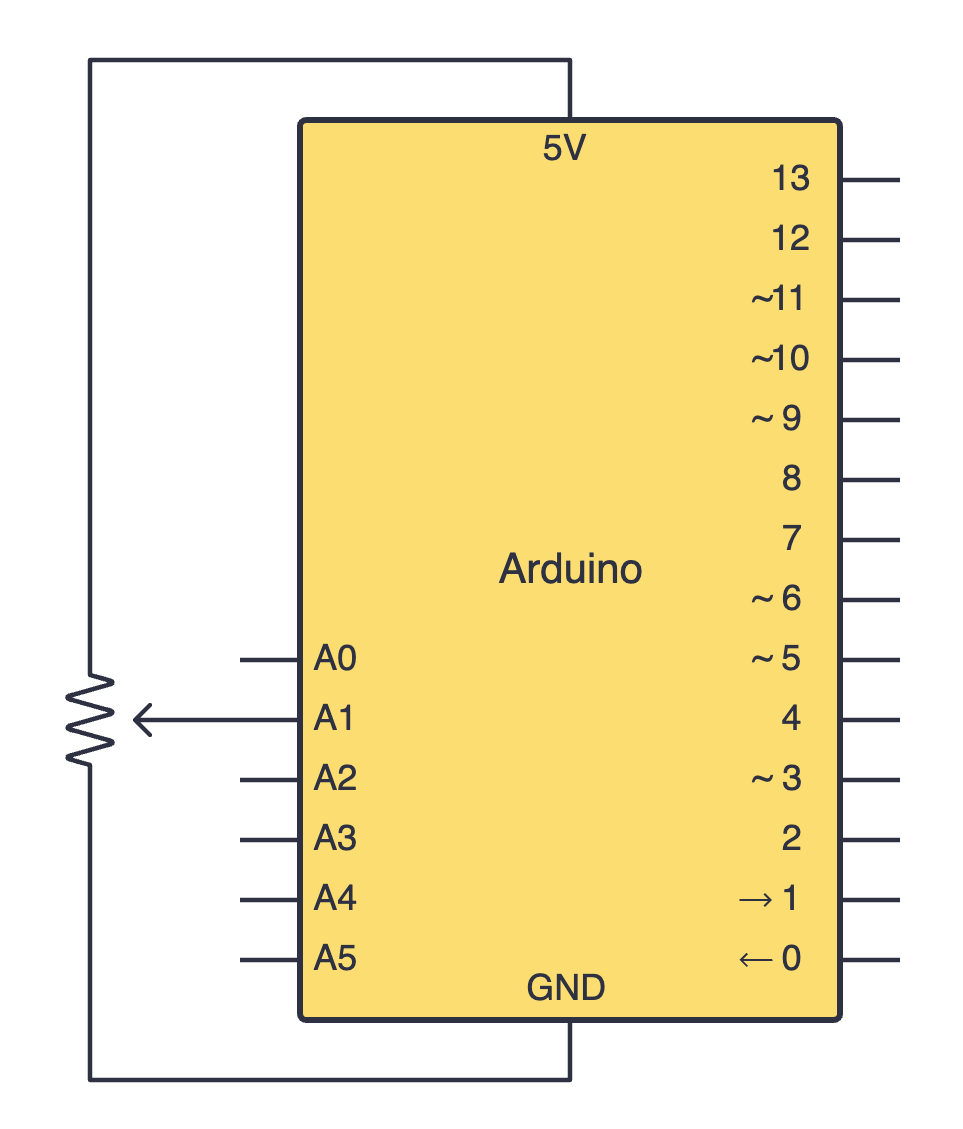
Try building your circuit using the schematic above.
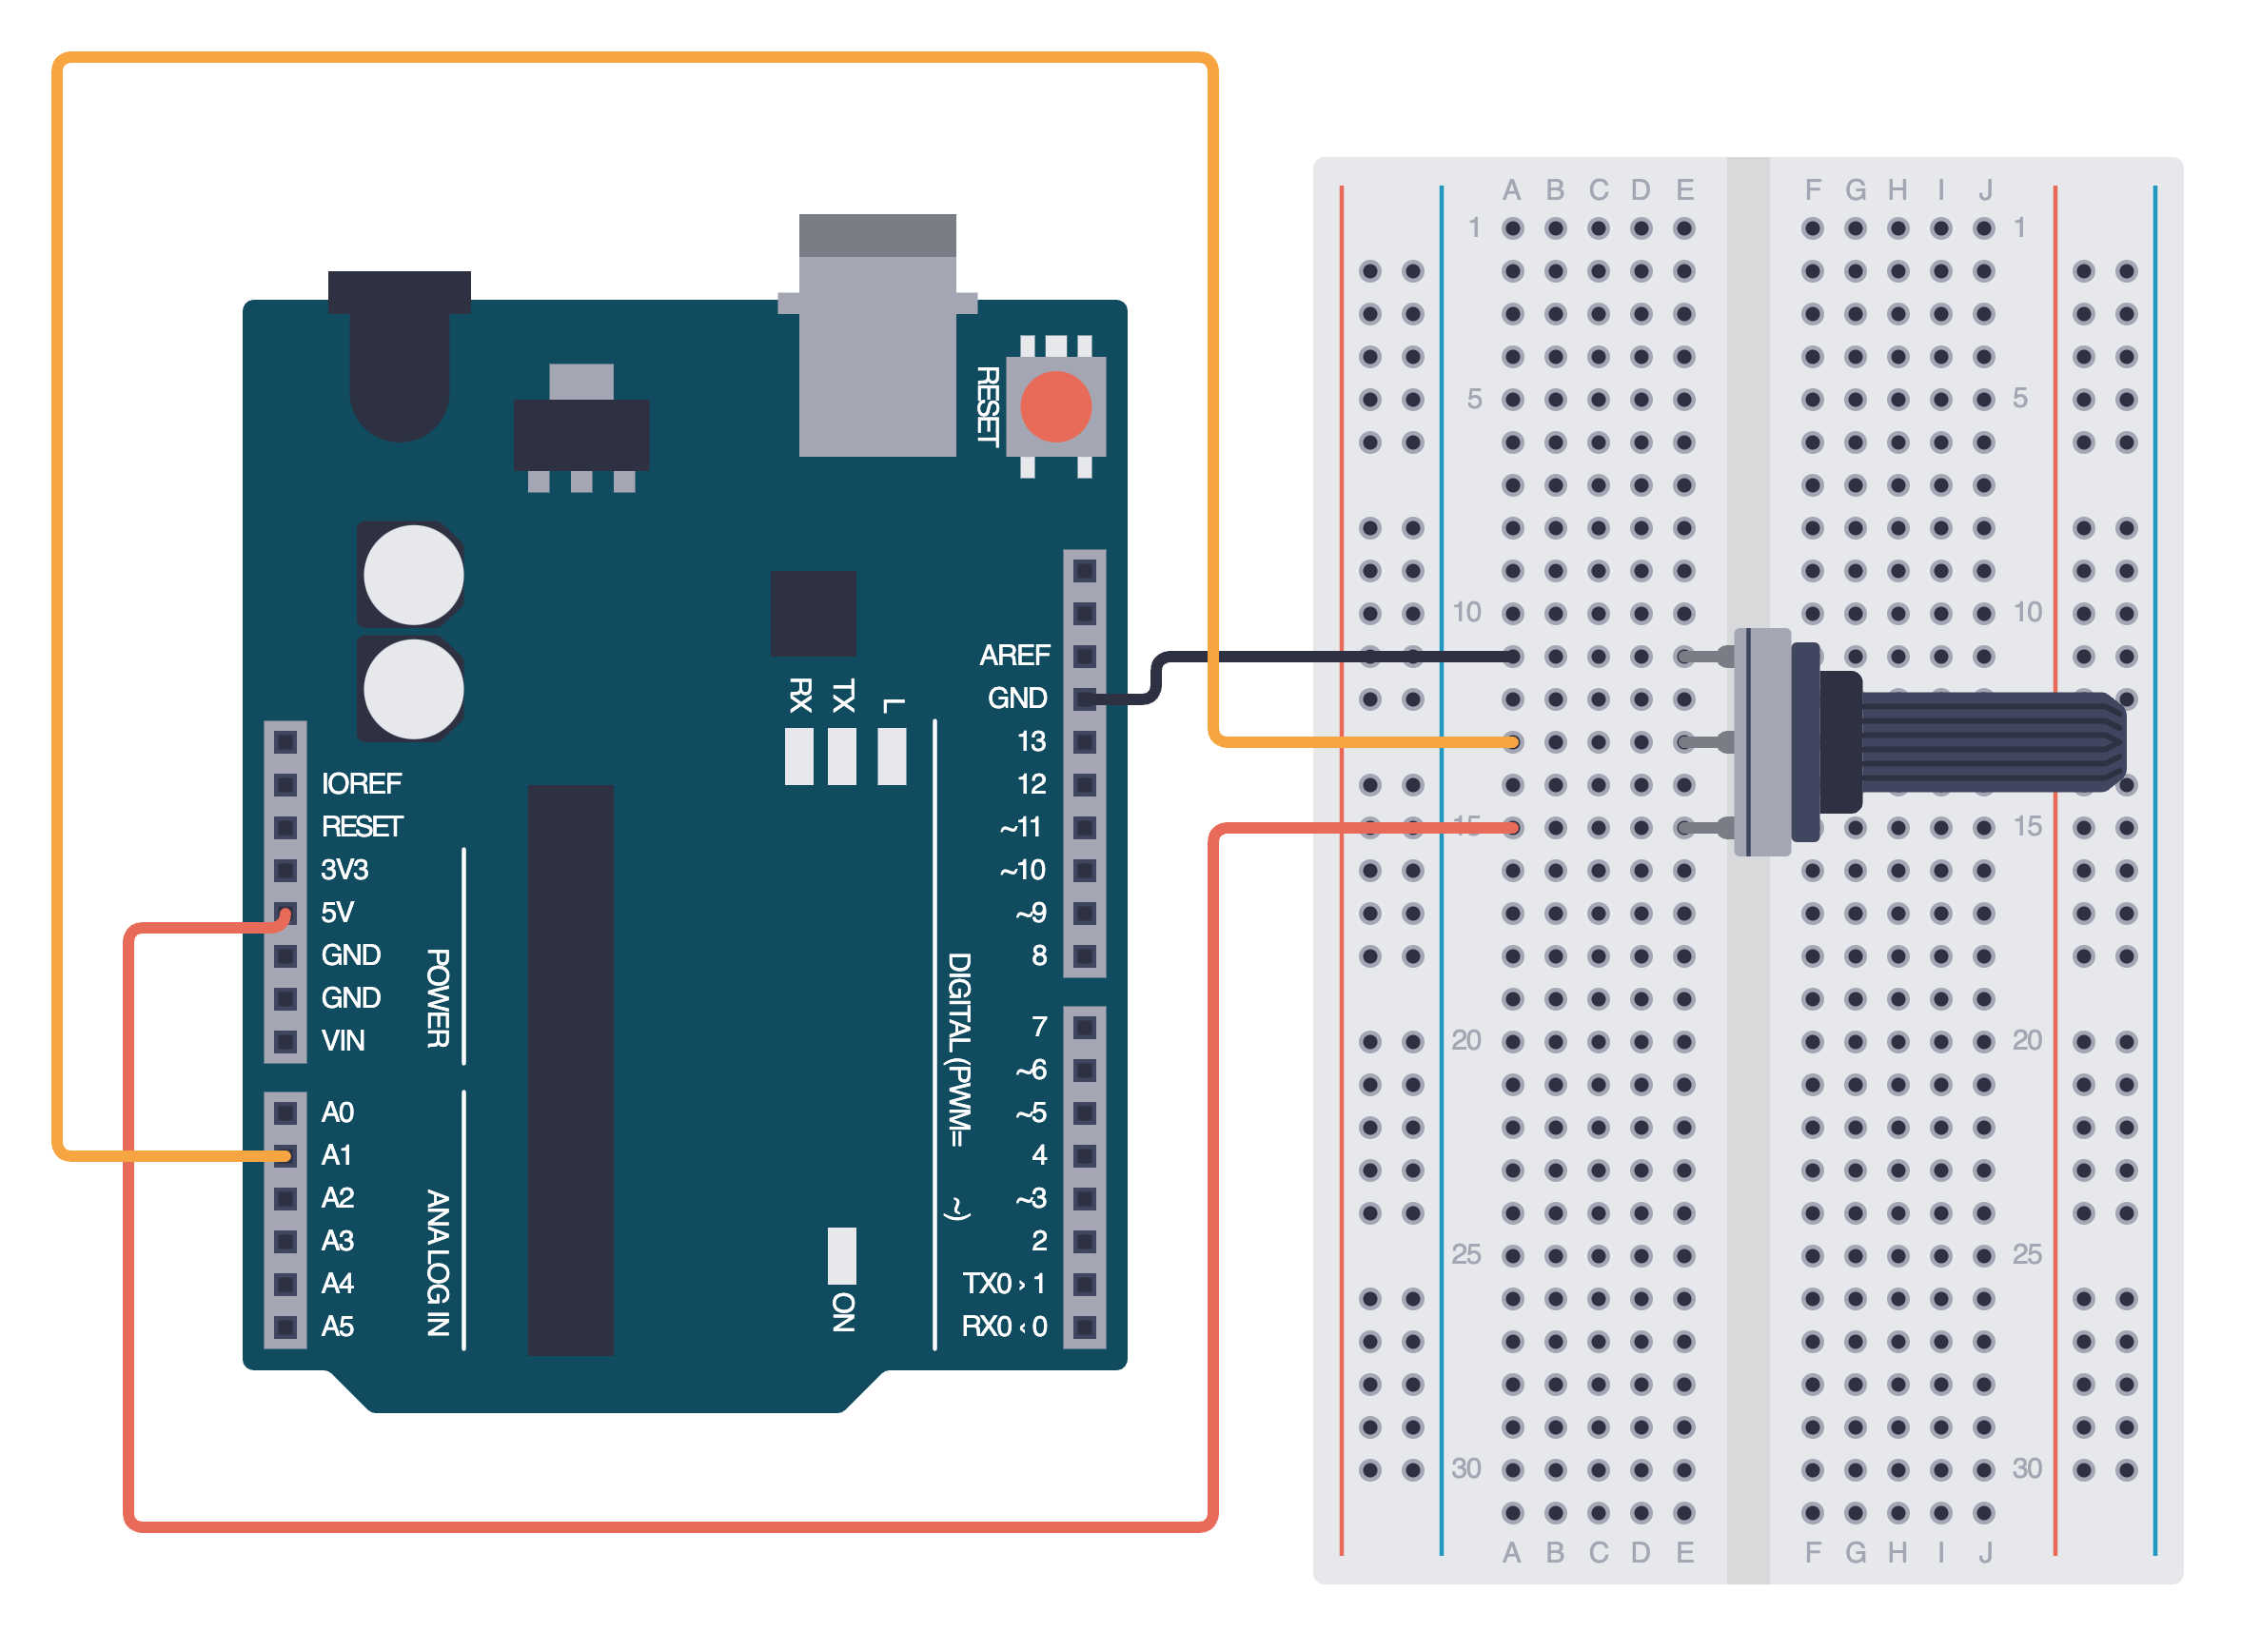
Below is the equivalent circuit diagram for this schematic. Did you hook up your components correctly?
Programming your potentiometer
Once you have connected your components in a circuit, let's work on programming our Arduino to read the potentiometer's position. To read the potentiometer's position, we use the analogRead() function. This function reads the voltage at an analog pin (A1) and gives us a value between 0 and 1023 where:
- 0 refers to 0V (when the knob is all the way to one side)
- 1023 refers to 5V (when the knob is turned all the way to the other side)
Thankfully, we don't need to use the pinMode() function when working with an analog pin. Therefore, we can create a simple program to read and print the potentiometer's position to the serial monitor as shown below:
int potVal; // will store the potentiometer's position value

void setup() {
  Serial.begin(9600);
}

void loop() {
  potVal = analogRead(A1); // stores the value into potVal
  Serial.println(potVal); // prints potVal out to the serial monitor
  delay(500);
}
map()
Often, we need to use the map() function when working with potentiometers. For instance, when controlling LED brightness using a potentiometer.
The map() function allows us to scale a value from one range to another. For instance, when the value read using analogRead() is between 0 and 1023, and the value to be output to an LED using PWM is between 0 and 255. The function uses y = mx + c, so that you don't have to do the math yourself. This is how we can use the function in our sketches:
map(value, fromLow, fromHigh, toLow, toHigh)
Assignment
- Use what you have learnt about potentiometers and the
map()function to create a dimmable LED. Construct a circuit that uses a potentiometer, an LED and a current-limiting resistor. Then, write a program which reads the potentiometer value and maps it to a range that can be used with your LED. As you twist your potentiometer to the right, the LED should shine brighter.
Next Steps
This section includes links to help you dive deeper into the topics from this lesson. It's optional, so don't worry if you choose to skip it.