Understanding Servo Motors
A servo motor is a type of motor which can be used to introduce motion into our projects. They allow us to produce precise movements and hence control the position of objects.
How it works
Servo motors usually have an arm which can turn between 0 and 180 degress. We can program our servo using the Arduino IDE to make it turn to a specified angle.
Servos are "all in one", which means they contain the motor, motor driver, etc all in one. This means that we do not need to connect additional hardware to them.
Constructing your circuit
Components required:
- 1x 5V Servo motor
- Arduino board
- Jumper wires
- Problem
- Solution
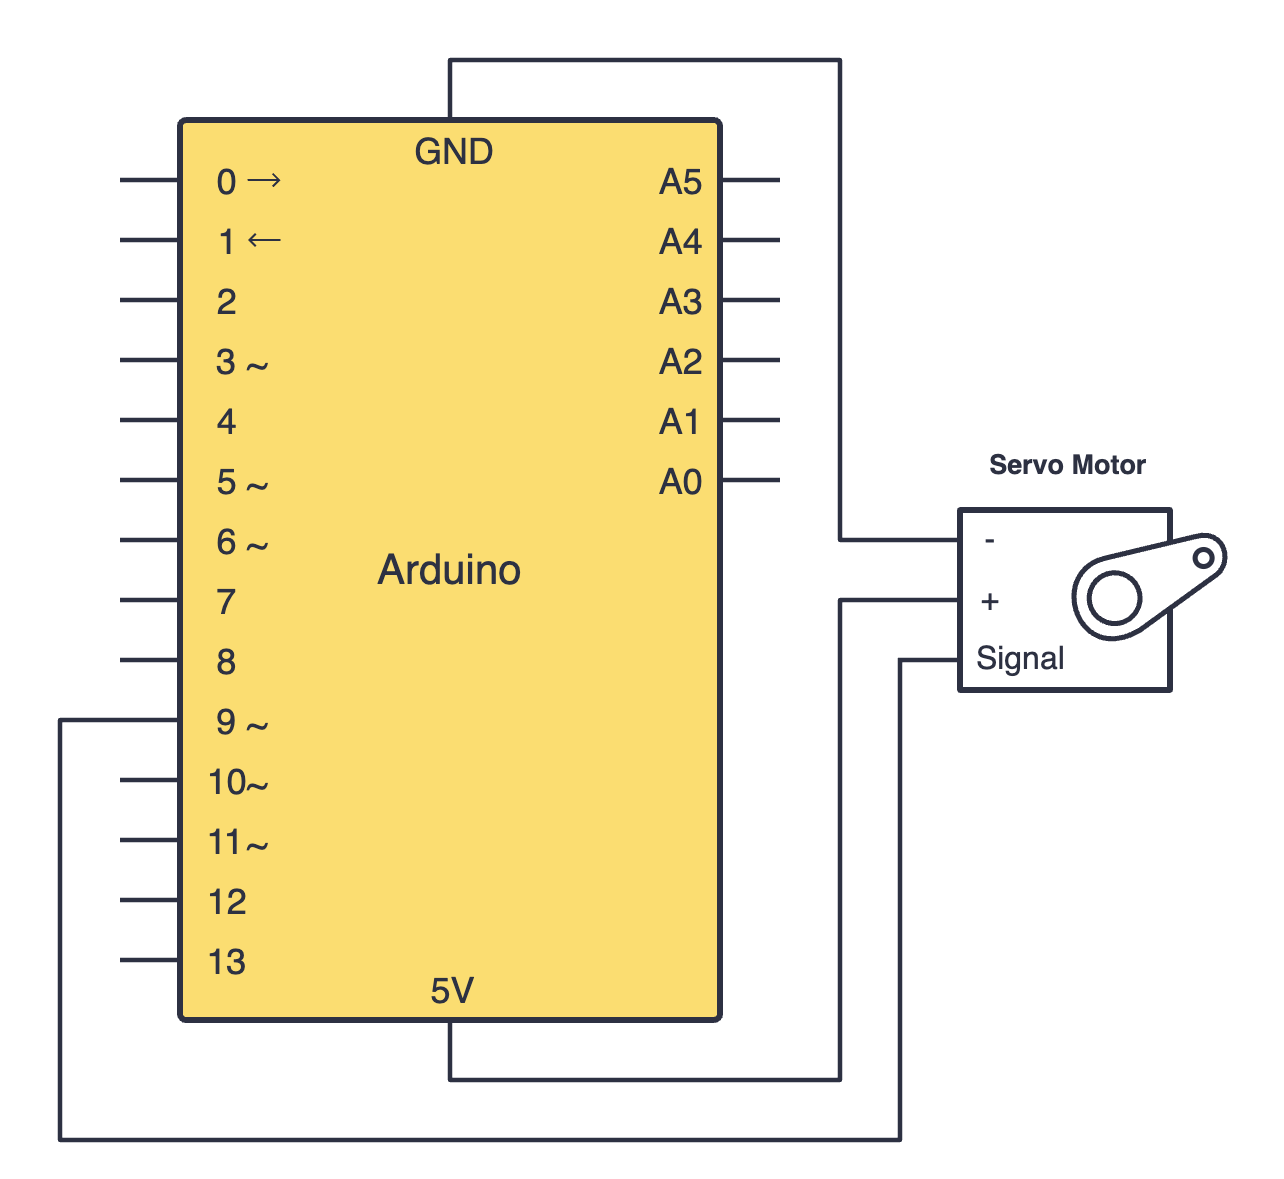
Search up your servo motor's datasheet online. Datasheets will be your friend when learning about new components since they provide all the necessary information you will need to construct your circuit. Try building your circuit using this schematic:
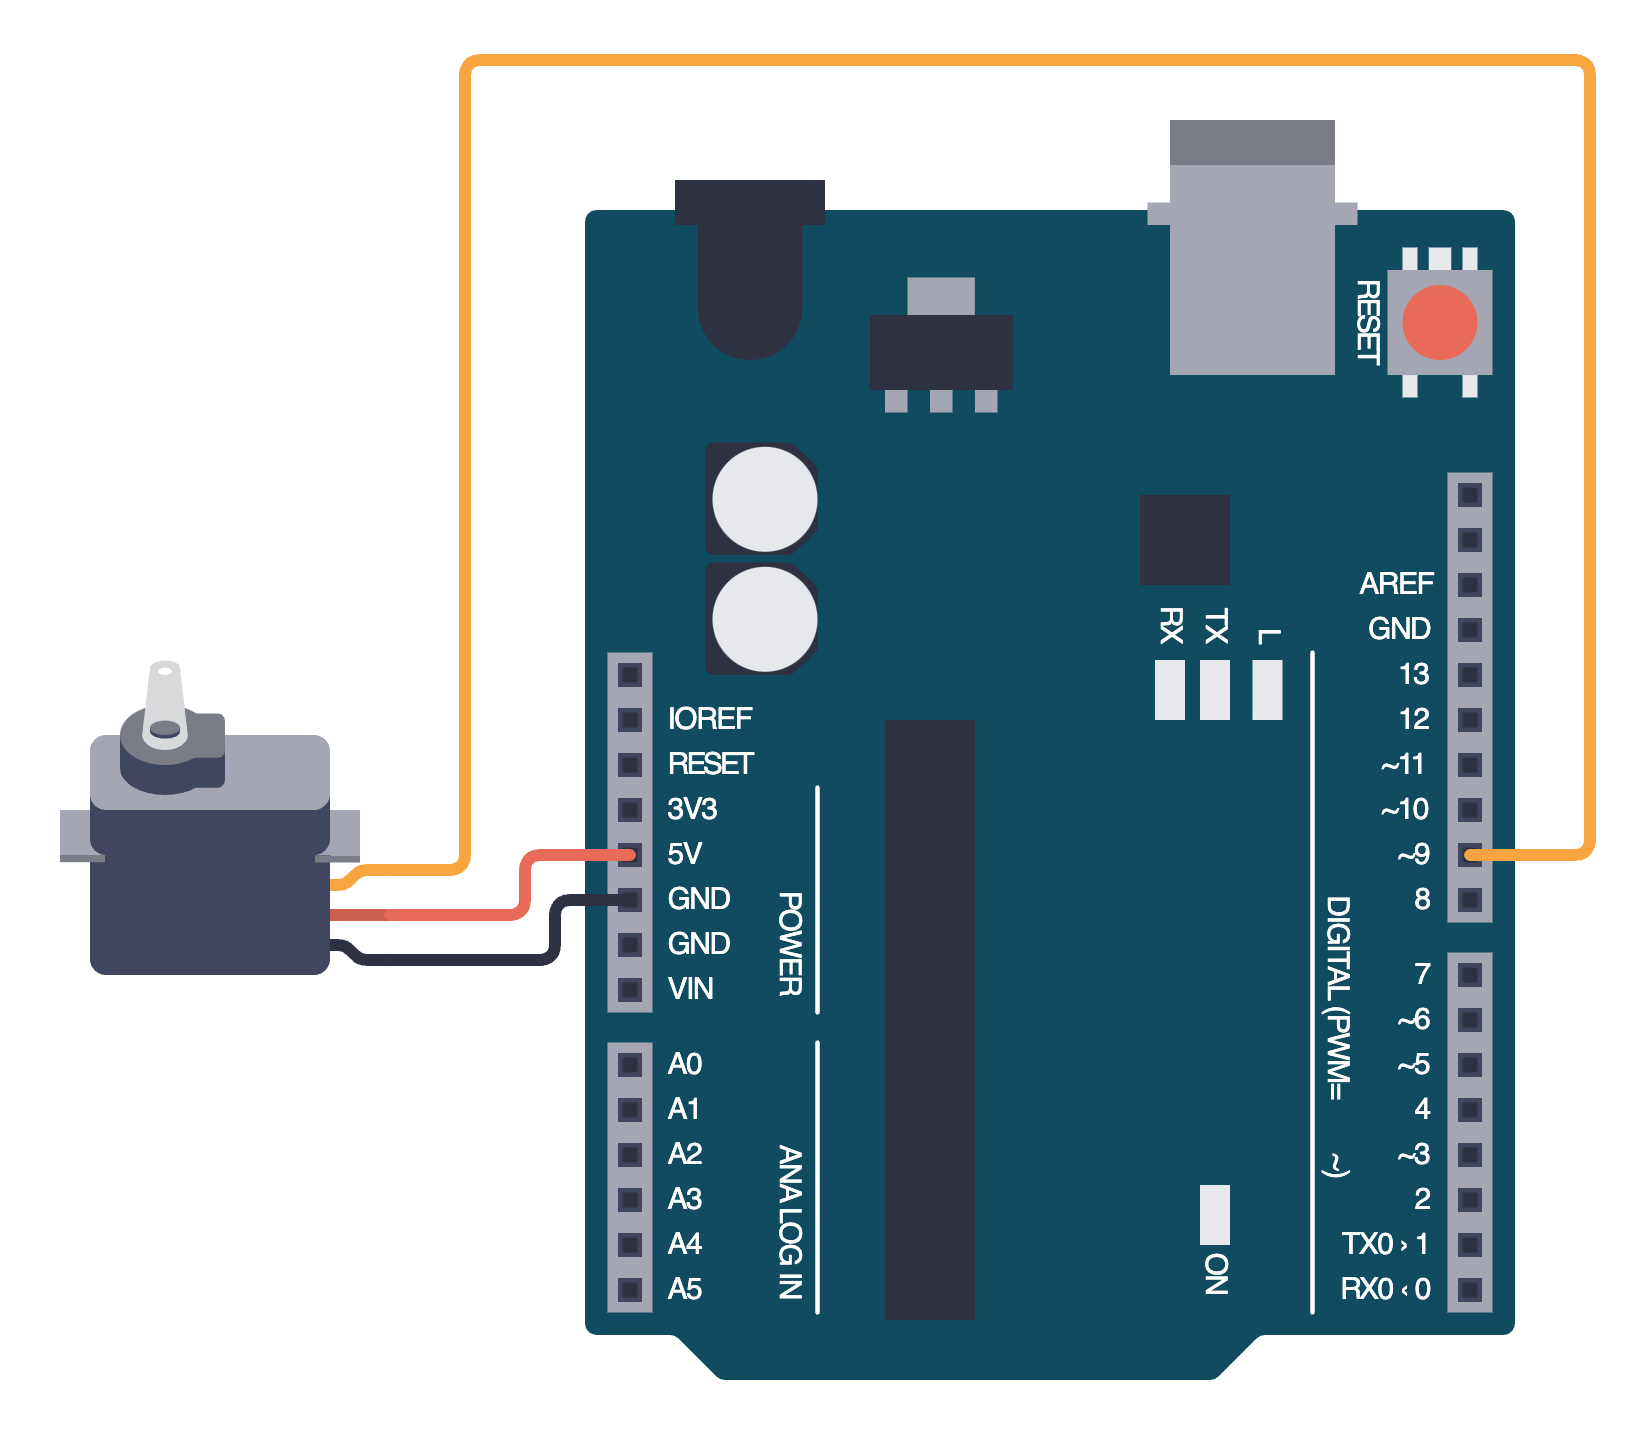
Below is the equivalent circuit diagram for this schematic. Did you hook up your components correctly?
Programming your servo motor
To program your servo motor to start moving, we need to learn how to include a library. To include the Servo motor library, we use:
#include <Servo.h>
This inclusion allows us to use the library's functions in our sketch. We can then program our servo to move using these functions:
#include <Servo.h>

Servo myServo; // Creates a servo object called myServo

void setup() {
  myServo.attach(9); // Connects servo to pin 9
}

void loop() {
  myServo.write(90); // Moves servo to 90 degrees
  delay(1000);       // Waits for 1 second
  myServo.write(0);  // Moves back to 0 degrees
}
- Problem
- Solution
Try modifying your code to make your servo motor sweep. This means, to make your servo move back and forth smoothly from 0 to 180 degrees.
#include <Servo.h>

Servo myServo;

void setup() {
  myServo.attach(9);
}

void loop() {
  // Move from 0° to 180°
  for (int pos = 0; pos <= 180; pos++) {
    myServo.write(pos);
    delay(15);
  }

  // Move from 180° back to 0°
  for (int pos = 180; pos >= 0; pos--) {
    myServo.write(pos);
    delay(15);
  }
}
Assignment
- Connect a potentiometer and a servo motor to your Arduino. Use the potentiometer to control the angle of your servo motor. You can do this by reading the potentiometer's values and then using the
map()function we used earlier. Feel free to take a look back at previous lessons if you've forgotten how a component works.
Next Steps
This section includes links to help you dive deeper into the topics from this lesson. It's optional, so don't worry if you choose to skip it.
- Servo Motor Basics from the Arduino Docs is a great read.