The Joystick
A joystick module allows us to create interactive projects. Joysticks can provide input in the horizontal (x) and vertical (y) direction as well - just like a joystick on a games console.
How it works
A joystick essentially uses two potentiometers placed at right angles to each other.
- One measures movement along the x-axis.
- One measures movement along the y-axis.
Alongside this, a joystick usually has an integrated push button which we can use to take input from the user. When we move the joystick knob around, the potentiometers change their resistance, and this change in voltage is read by the Arduino's analog pins.
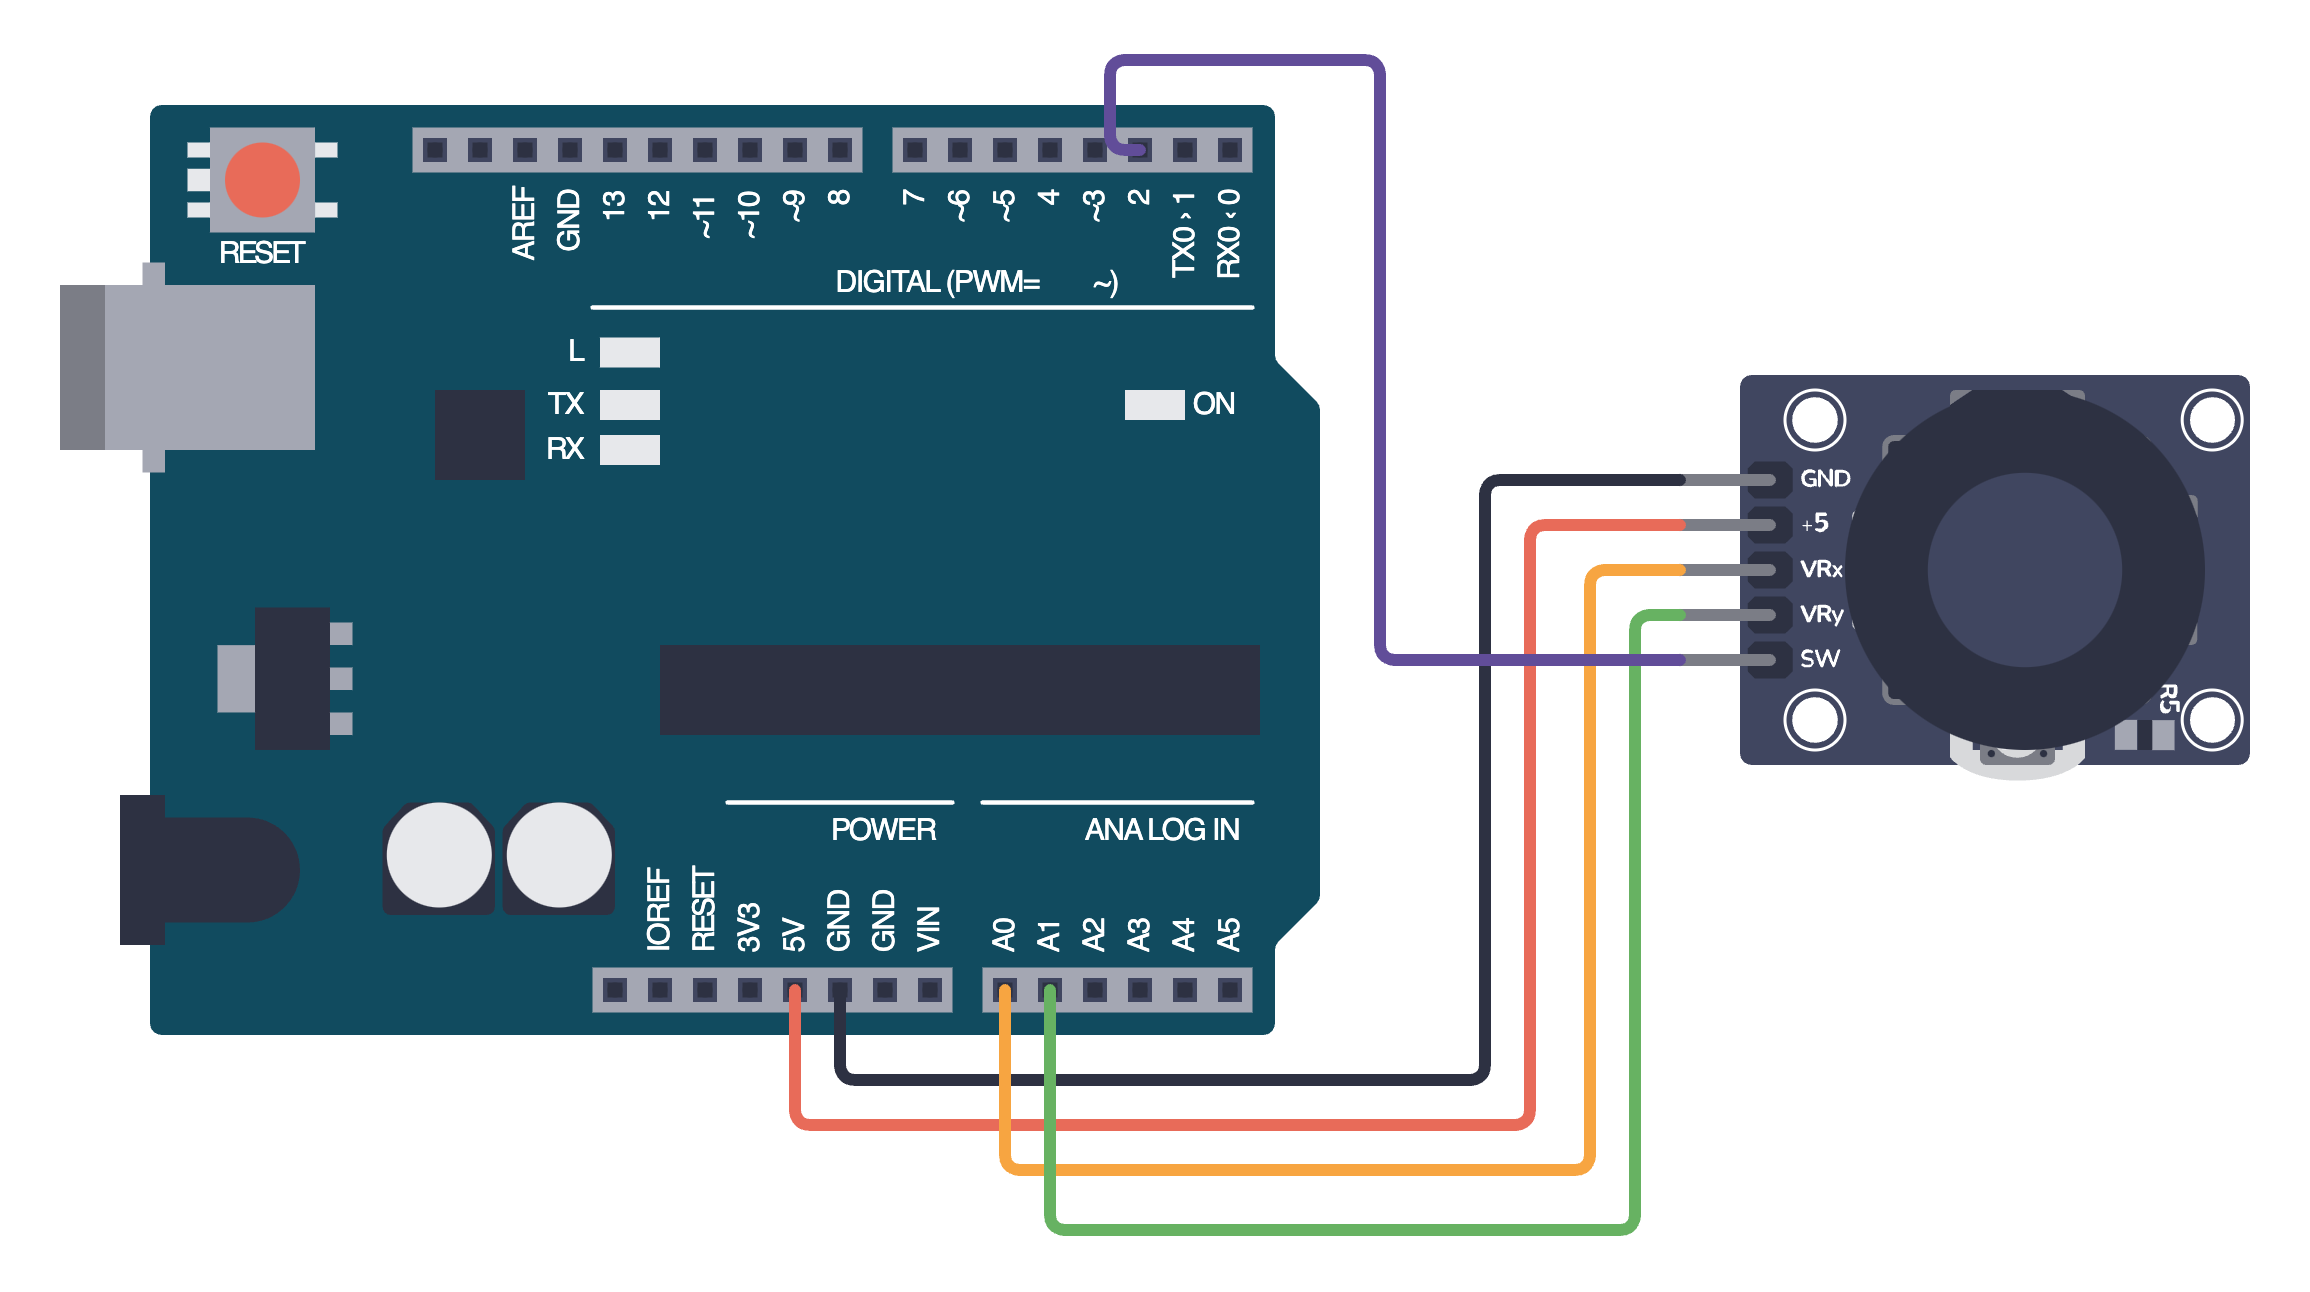
Constructing your circuit
Components required:
- 1x Joystick module
- Jumper wires
- Arduino board
- Problem
- Solution
Search up your joystick's datasheet and pinout online. Then, try to build your circuit on the breadboard. You can use this pin layout to help:
- VCC → 5V
- GND → GND
- VRx → X-axis analog output (connect to A0)
- VRy → Y-axis analog output (connect to A1)
- SW → Push button digital output (connect to D2)
Below is the equivalent circuit diagram for connecting a joystick to your Arduino board. Did you hook up your components correctly?
Programming your joystick
We can use the analogRead() function to read the voltage from the two potentiometer's and the digitalRead() function to control our push button. Here's an example sketch to read the joystick's values and print it to the serial monitor:
int xPin = A0;  // VRx
int yPin = A1;  // VRy
int buttonPin = 2; // SW

void setup() {
  Serial.begin(9600);
  pinMode(buttonPin, INPUT_PULLUP); // Activating the in-built pull-up resistor
}

void loop() {
  int xValue = analogRead(xPin);
  int yValue = analogRead(yPin);
  int buttonState = digitalRead(buttonPin);

  Serial.print("X: ");
  Serial.print(xValue);
  Serial.print(" | Y: ");
  Serial.print(yValue);
  Serial.print(" | Button: ");
  Serial.println(buttonState == LOW ? "Pressed" : "Released");

  delay(500);
}
Assignment
- Try to create a program which controls a servo motor and an LED using a joystick. The x-axis of the joystick will control the position of the servo. The y-axis of the joystick will control the brightness of an LED - moving the joystick up or down will make the LED brighter or dimmer. Remember to use PWM for this! The joystick push button will act as a reset: when pressed, the servo will return to its neutral position and turn the LED off.
Next Steps
This section includes links to help you dive deeper into the topics from this lesson. It's optional, so don't worry if you choose to skip it.
- The joystick is a very useful component we can use to create interactive projects. For example, check out this project in which a joystick was used to control Subway Surfers.